Amazing Dmax: Epson SureColor P5000 review
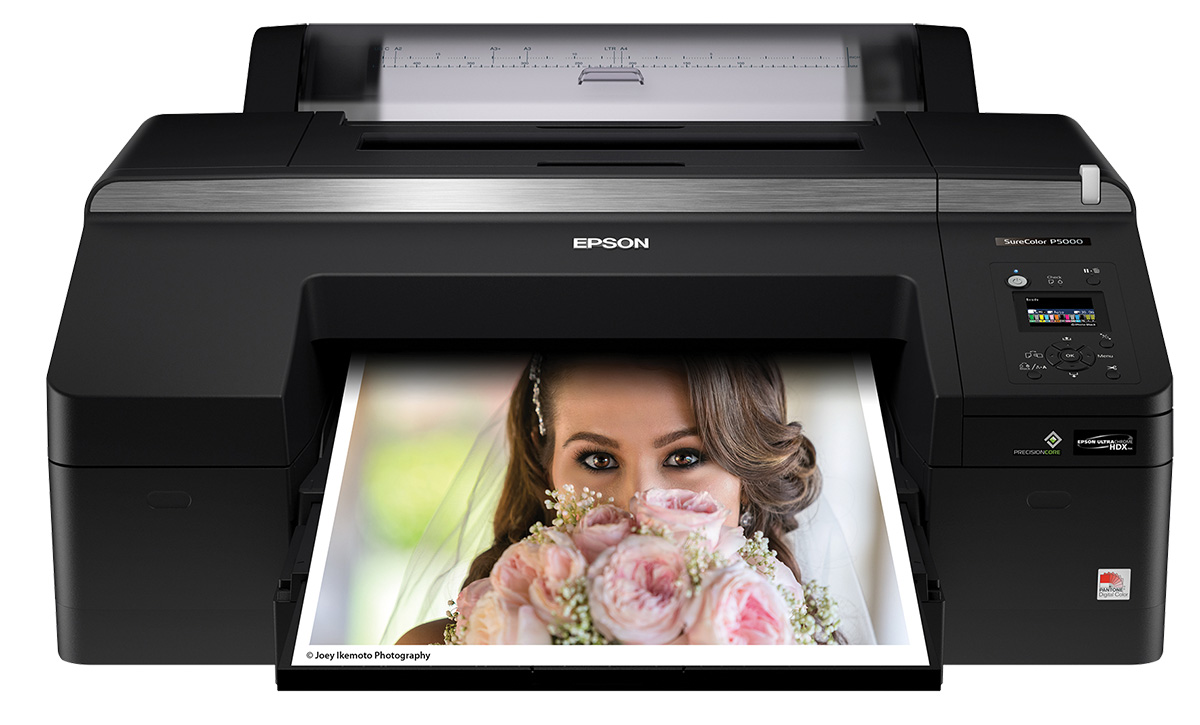
Review: The Epson SureColor P5000 is an excellent printer for fine art, portrait, wedding, and some event photographers. The printer speed, sheet and roll handling, incredible color gamut, and deep, rich shadow density make it a winner.
10.24.2017
What was once only a dream for many photographers—owning a high-quality, affordable personal photo lab—became possible about a decade ago. But the reality of that dream has come with a steep learning curve and a significant investment in time and money. As a result, many photographers still use a professional lab for their printing needs. However, having a high-end inkjet printer like the Epson SureColor P5000 in your studio can help set you apart from the competition. It enables you to fill fast-turnaround orders and print on specialty materials, such as coated watercolor papers, for gallery shows and fine-art pieces.
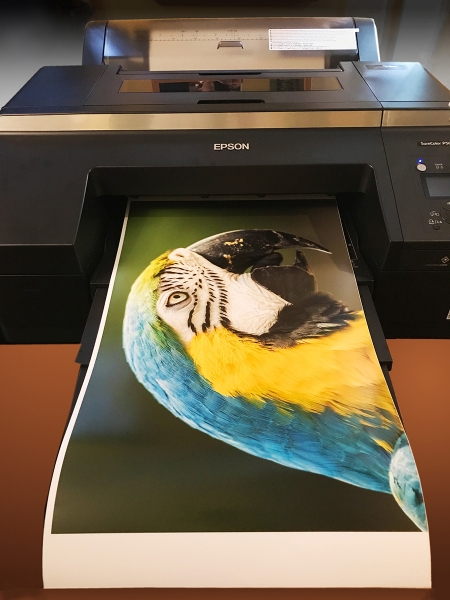
Epson SureColor P5000 with a 17x25-inch print, output on Ultra Premium Photo Paper Luster
I’m familiar with the P5000 form factor through my Epson Stylus Pro 4000 and Stylus Pro 4900, which the SureColor P5000 replaces. Both have been workhorses. And after putting about a hundred prints of varying types and sizes through the P5000, I’m convinced it will follow suit.
The SureColor P5000 has no shortage of specs and features, and you should explore those if you’re interested in the Designer or Commercial Editions of the printer. (I tested the Standard Edition.)
Unpacking, setup, and connectivity
For a 17-inch-wide model, the SureColor P5000 is a big printer. It weighs just under 115 pounds, and the shipping box (about 36x40x24 inches) has special quick-release plastic handles that allow the four sides of the box to release from the bottom, making it easier for two, three, or four people to remove the printer and place it. It’s a sturdy, hi-tech machine that looks like it was built for NASA.
It took me about 45 minutes to set up the P5000 and begin printing. That includes removing protective tape, setting up the paper cassette and output trays, installing the ink cartridges, downloading the printer driver and utility, installing a roll of paper onto the roll spindle, and connecting the printer to my computer.
Connectivity options include one USB 2.0 port and one 1000Base-T Ethernet port for network printing, or for printing directly to a computer using an Ethernet crossover cable. It’s worth noting that unlike the SureColor P600 and P800 printers, the P5000 has no built-in Wi-Fi printing capability. I used a 15-inch MacBook Pro to do my testing, and I had no problems with the driver on Mac OS X El Capitan (10.11) and Sierra (10.12).
Paper feed options and experiences
The P5000 has four paper feed options: roll media feeder, front paper cassette, single sheet top feeder for medium to heavyweight papers up to 0.48 mm, and a front media path for heavy papers, including boards up to 1.5mm thick. All of the sheet feed options have a minimum paper size of 8x10 inches and a maximum of 17x22 inches.
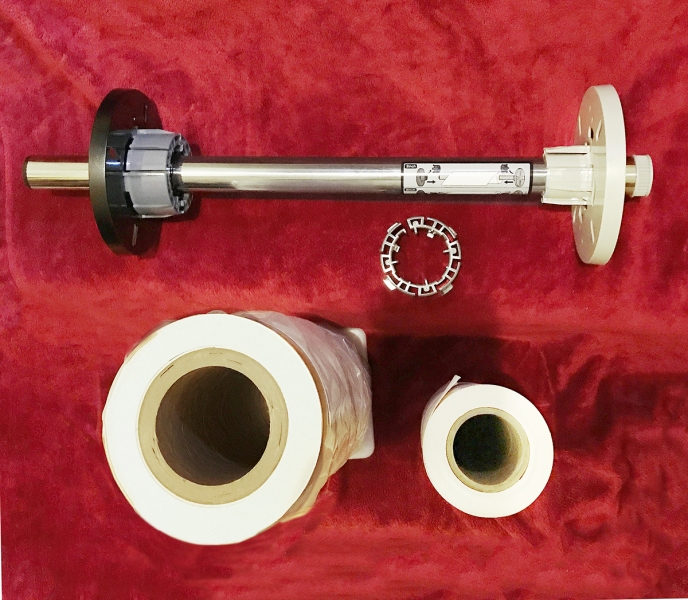
The roll spindle and 2-inch roll adapters ship with the P5000. Notice the 3-inch core diameter on the canvas on the left and the 2-inch core diameter canvas on the right.
The printer supports roll papers with either 2- or 3-inch cores, thanks to the included roll adapters. I recommend using papers with 3-inch cores when possible because most media will curl less when wound on the larger core. The P5000 also comes with a borderless printing spacer, which is a small plastic disk that can be very helpful if you want to avoid extra cutting when using specific roll paper sizes for borderless printing, namely 8-, 11- and 16.5-inch rolls. The roll paper adapters are easy to use once you learn how to release and then lock them into place.
The roll feeder worked extremely well with both semi-gloss paper and canvas. Its motorized design really helps to keep proper tension on the roll when loading the paper, and it allows for hands-free printing when you have multiple print jobs, one after the other (no reloading needed). The printer also has a rotary cutter, which cuts very quickly through the semi-gloss and canvas roll papers I tested. Cuts were clean but not perfectly straight. I observed a very subtle wavy”pattern with semi-gloss papers. With canvas the cuts weren’t wavy, but they were slightly curved, either on one or both sides. That said, the cutter is a useful feature. For jobs that require a precise final cut, leave some extra space and finish the cutting with a safety ruler and knife or a rotary cutter like the Rotatrim. Vacuum the paper feed area from time to time (or after each cut) depending on the media you use. If you use a paper that sheds a lot (leaves bits of paper behind when cutting), I recommend cutting your prints manually.
Being able to load the P5000 paper cassette tray with 100 sheets of high-quality semi-gloss paper, and having the printer ready at a moment’s notice to print out quick proofs, final prints, or contact sheets is a valuable feature. It’s also what sets this printer apart from many others. I primarily used Epson Ultra Premium Photo Paper Luster in the cassette. I did a multi-print test by printing the same image on twelve sheets, and it fed every sheet perfectly.
Each paper feed option has a maximum recommended media thickness, and the top feed accommodates sheets up to 22 mil without problems. Being able to print through either the top or front manual feed or from the roll feed when the cassette has paper in it is another nice feature.
Ink info, print quality, and longevity
At the heart of this printer is its ink set, UltraChrome HDX. It contains 11 inks with 10 inks in use at any time (photo black and matte black are shared by one ink channel). It’s the same ink set used in Epson’s SureColor 7000 and 9000 large-format printers. The ink set includes two new colors, orange and green, which help to boost the overall color gamut. Only one ink cartridge size is supported (200 ml), and the printer ships with a set of inks cartridges that contain 80 ml each.
Print quality, including sharpness, detail, and color vibrancy was truly stunning on all of the inkjet papers and canvases I tested. At the same time, skin tones looked natural, which is a testament to the quality of the printer, inks, software, and vendor-supplied profiles. If I owned this printer, I would make custom paper profiles for my favorite papers, though the supplied profiles were extremely good overall. I tested a variety of media including Epson Premium Luster, Epson Exhibition Canvas Natural Matte (and Gloss), a few Epson Legacy fine-art papers, and a few baryta and other fine-art papers from Hahnemühle, Moab, and Red River Paper.
If any new feature of this printer deserves a mention, it’s the fact that Epson has reformulated the black inks to achieve 1.5 times more density than its previous ink set, (Epson UltraChrome HDR), and it shows (especially on matte papers). Epson’s last few generations of pigment ink printers could produce outstanding black density (Dmax) on semigloss and gloss papers, but matte papers were a different story. Many matte papers, even after much effort, had a less than ideal maximum black level. But this new ink set and printer combine to produce deep shadows on a much wider range of papers. The black-and-white output using the Advanced Black and White Print mode also impressed me due the rich shadow density, the even tonal range from highlight to shadow, and relatively little color shift between different light sources.
One of the most important aspects of a printer to photographers and collectors is the expected longevity of its inks for both color and black-and-white printing. According to news from Wilhelm Imaging Research, preliminary results show that, depending on the type of paper, the new inks can provide print permanence ratings of up to 200 years for color prints and likely in excess of 400 years for black-and-white prints printed with Epson’s Advanced Black and White Print Mode. Those are impressive numbers.
Epson has also been working to make head clogging less of an issue. According to its website, the printer has improved dust and static control for reduced print head maintenance as well as an ink-repellant surface coating to minimal nozzle maintenance. I did not experience any clogging, and the printer rarely stopped for a cleaning. That’s in part due to the fact that I set the printer to clean periodically, and not before each job.
One negative note is that you can’t just switch between paper settings that use the Photo Black or Matte Black ink and have the P5000 print without missing a beat. Even though it’s automated, you’ll need to wait about three to four minutes for the changeover before you can print, and some ink will be wasted along the way. Users can choose to either have the ink automatically switch based on the paper type chosen in the printer driver, or the printer can be set to alert the user on the printer’s LCD when a changeover is about to happen. I prefer that option because it’s fairly easy to choose the wrong paper type by mistake.
There are a number of nozzle check options, and you can do a nozzle check without making a print, which can save paper. The printer allows you to choose from three auto cleaning settings, including: On: Periodically; On: Every Job, and Off. My recommendation would be to set it to On: Periodically or Off, depending on how much you print. If you print almost every day, Off may be fine, but the only way to know will be by making prints and examining them closely. I always print a standard image at about 4x6 to 8x10 inches in size before doing an important print job because it gives me a better idea of the health of my printer than just printing a nozzle check pattern.
Find test images at Inkjet Tips under section L2.2.
I tested the auto head alignment on paper and canvas, which took about two and a half minutes each, and used the equivalent of a letter-size sheet of paper or canvas for each of the two options I chose (Auto Uni-D and Bi-D All). I recommend following the manual’s suggested procedure for head alignment to optimize print quality, especially if your printouts become grainy or blurry, you notice misalignment of vertical lines, or if you see dark or light horizontal bands.
Printing speed and print driver suggestions
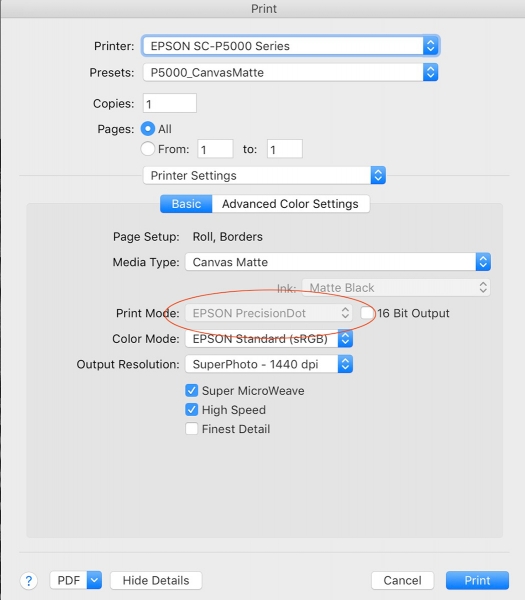
One of the biggest pleasant surprises I got when testing the printer was the excellent print quality at just 720 dpi (print driver set to High Speed and Super MicroWeave). I chose Super MicroWeave whenever that option was available because it only slowed print speeds by a small percentage. This is a game changer because with those settings, 17x25-inch prints can be made in just around three minutes, 40 seconds (3:40). This is compared with 5:19 at 1,440 dpi (high speed), and 8:29 at 2,880 dpi (high speed). I observed a tiny bit more detail at 1,440 dpi, and I saw another very small increase in detail at 2,880 dpi, but I doubt that many people would be able to see any real difference between them from a foot or more away.
I should also mention the ease at which the P5000 outputs panoramic prints. At 1,440 dpi (high speed), the P5000 printed and cut a 17x62 inch print in just under 13 minutes. At the 720 dpi setting, the same file took about 9 minutes to print. The maximum print length for Mac and Windows users is now about 529 inches (over 44 feet) from the roll feed.
Epson created a useful chart with print speeds at common sizes with the driver set to high speed, and my test results were very similar.
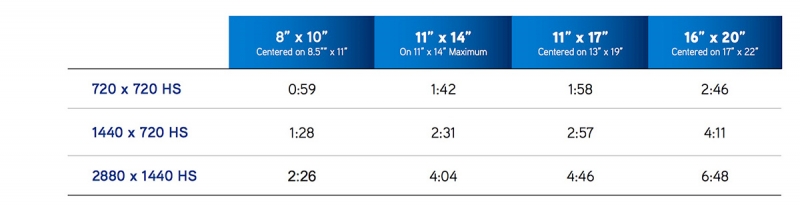
Courtesy Epson: Print times are based upon the start of printhead movement over the page to drop ink; stop time based on printhead moving to the "park."
In the print driver, when any canvas media is selected, the Advanced Black and White mode (ABW) is greyed out (unavailable). When I asked Epson about this, they sent this explanation: “Advanced Black and White mode does not use Yellow Ink in the quantities necessary to build a rich composite black on canvas. For B&W canvas prints … send the print via a normal ICC profiles workflow.” Essentially, Epson is recommending users print on canvas like they would print full-color images on fine-art papers using supplied or custom profiles.
Despite that suggestion, which very well may be the case (especially when warm toning is selected in the ABW mode options), my results on a few Epson canvases found that images look outstanding printed with the ABW (similar to when printed on fine-art papers). If you’d like to test out ABW with canvas, you can do it by choosing a paper with similar thickness to the canvas, such as Hot Press Bright for matte black ink (matte canvases), and Exhibition Fiber for photo black (semi-gloss and gloss canvases).
Comparison with the SureColor P800
Why would a photographer choose this printer over the Epson SureColor P800?
- Improved paper handling through the cassette
- Wider color gamut
- Lower overall ink cost (about 53% percentless expensive per ml)
- A more user-friendly and less time-consuming manual loading procedure for sheets over about 200 gsm
- Automated rotary cutter for roll papers saves time
Why choose the P800 over the SureColor P5000?
- Printer cost (without roll media adapter) is about $600 less
- Roll media adapter is optional (adds about $200)
- Much smaller size (fits on most desks or vehicles)
- Relatively portable (one-person carry is possible)
- Less overall per-cartridge ink cost due to 80 ml size
- Considerably quieter operation
I should also note that for those who don’t need a 17-inch-wide printer, the 13-inch-wide SureColor P600 (about $800) offers many of the same features of the P800, plus it includes a roll paper holder.
Conclusion and recommendations
After looking closely at the Epson SureColor P5000 and watching many prints come through the machine, I believe it’s an excellent printer for fine-art, portrait, wedding, and some event photographers (if you don’t have to transport it). The printer speed, sheet and roll handling, incredible color gamut, and deep, rich shadow density make it a winner for those who will keep it.
Andrew Darlow is a photographer, author and consultant based in the New York metro area. focusandfilter.com
Tags: epson